

Post by Ela @ GK on Aug 26, 2006 3:01:38 GMT -5
Opening & Saving Files
Since this is the first of the lessons of the lowest level, a quick explanation of opening files and save the files is in need. Firstly, to open files, you must first open the program. You should get a blank rendering screen - a large blue square - which means the program is fully loaded. Go into the "File" menu and select "Open..." from the menu. The first time you use the PWS program, you will have to navigate to your Petz resource file.
For Petz 5
C: (c drive) -> Program Files -> Ubisoft -> Petz 5 -> Resource -> Dogz/Catz
For Petz 3/4
C: (c drive) -> Program Files -> Petz 3/4 -> Resounce -> Dogz/Catz
C: (c drive) may vary depending on your drives. Some computers will have a "D: (d drive)" or a "Z: (z drive)", some will even have other lettered drives. It is helpful to knwo where your petz game is installed, so once you find its location, you should make a note of it so you can know later on in the future.
Once you have navigated to the resource folder, you go into either the Dogz folder or the Catz folder, depending on what game version you own or wish to hex in. Once in that folder, choose what breed you wish to work with. By selecting your prefered breedfile, choose "Open" and the file will load. Like loading the program, loading a breed for the first time may take a few moments for your system to recognise and load all the renderings.
After you make any changes, you will want to save them. Thee are two saving methods, but for the beginners lessons, we will stick to the standard saving method which will allow you to create "Hexed petz" rather than new breedfiles.
To do this standard save, go into the "File" menu and select "Save". Be sure you do not choose "Save as..." when doing this. When you choose "Save" the program will pause for a brief moment (varying greatly on your computer speed) while it saves. If you selected the wrong one, a save window will pop up, which you do not want right now. After saving you are ready to continue hexing!
Note: For the beginner lessons, it is prefered you use Original UBISOFT or PFMAGIC breedz to work with. Hexed breedz tend to be a bit troublesome when removing variations and applying things.
WARNING: Always keep a backup of all breedfiles before saving your changes. Place a copy of the unaltered original files in a folder elsewhere on your computer so that int he future, you still posess them and can use them.
Variation Removal - Makes things Easier
To make things easier for the beginner, it is best to remove all variations. If you do not, during assignments it can be somewhat troublesome when trying to take out your finished product if you have the original variations hangign around in the file.
To remove the variations, after opening the breedfile, go to the "Breed" menu located at the top. From that menu, select the "Collapse all Variations" option. In hexed breedz, this will often times mess up the breed, which explains the reason for using original breedz for the lessons.
You now have a variation free breedifle to work with during these lessons! Now it will be significantly easier for you to learn and develope petz.
Basic Colour Changes
The Ball Colours
As default, the program automatically starts out on the colour tool when you open a file. If the colour tool at the top is not "indented" or "pushed in", click it so that it is. The colour tool, found at the top, is a circle with blue & red colouration. It should be the second tool on the bar. Below the breed rending you will see the following square and text:

Currently, the square (I will call this the display box) should be white with a red diagnal line through it. This shows that no colour is chosen therefore a default one will be in place, the default usually being basic black, no texture visible. To change this colour click the display box and a new window will pop up with all the possible colours on it which will look something like this:

Select a colour of your choice by clicking the box in which the colour resides. Once you select the colour, the colour's small box should get a series of dashed borders to show you it is selected. From there, click "OK" and the window should close. Once it does, your selected colour will appear in the colour display box.
When hexing, textures are always your friend. The game, however, only recognizes certain colours to have textures on them. It is best you use colours between 10 and 149. All other colours do not show textures. It prefered you stick to using the textured colours for all body colouring as many people do not like the untexture look - making the petz look flat instead of dimensional.
Now that you have the color selected, its time to apply the colour to the balls. There are two methods of doing this: One-by-one and Complete, as I like to call the methods. One-by-one is the first you will learn. Its great when you only want to colour a few balls on the file.
Once you have the colour selected, bring your mouse pointed over the rendering screen (where the visual representation of the breed is, backed in blue background). Click on the ball which you wish to colour change. It will take a few seconds to change (time varying greatly on your computer speed). Once it does, you should notice a difference in the ball colour. Occassionally, with some original breedz, a ball may choose not to change, but this is a rare occurance.
Now, once you get used to individually painting balls, you may want to make all the balls one colour. You can do this by accessing the ball list at the right. To do this, on the right hand top side, you will see five tabs: Eyes, Textures, Balls, Variations, and Scales & Sizes. Choose "Balls" and a list will appear something like this:

Make sure that the colour tool is selected and continue. You can select which balls you want to apply the colour to by clicking them. When you click the ball, it will highlight in blue. If you want to choose more than one ball, hold down Control ( [ctrl] ) and click on all the balls you wish to apply the colour to. Control will allow you to select more than one ball at a time.
A faster way, if you wish to choose several balls in a row is to hold down shift and click the first ball in the sequence and the last ball in the sequence.Now that you have selected the balls, click "Apply Tool to Balls" beneath the list and all the balls will gain the new colour.
You now can "Hex Paint" the petz.
Eye Colour & Eyelid Colour
An important aspect of simple hexes (and complex) is to make sure that the eyelids match the main coat colour. The main coat colour is the colour which is more common on the hexed pet. Usually, you base the eyelids on what colour the head is so that they match and look flowing.
Open the "Eyes" tab, located to the right of rendering screen. Onc eyou do, it will open a small screen in that area which looks similar to the follow. Note that the colours may be different when you open the tab compared to the example below:

As you can see, there are three colour display screens in this tab: Left Iris, Right Iris, and Eyelid Colour. Each works much like the ball colouring tool when choosing your colours.
Start by clicking on the Eyelid colour display box. The standard colour chart will pop up like the one shown above (second image). Select the colour which suits the body colour best. I usually prefer makign the eyelids a shade darker then the main body colour. For example, if you make the main body colour 45, make the eyelid colour 49 (cream). After clicking on the appropriate colour, select "okay" and the eyelids will change.
Now for the eye colour!
Eyecolours are fun to play around with. It is best to experiment with eyecolours versus coat colour. In the end, it really comes down to personal preferences. Like the eyelids, you simply click on the colour display under the "Iris" headings to change the colour. However, unlike the eyelids, you can choose a different colour for each eye, which allows for many combinations with eyecolours.
Teacher's Preference:
My personal favourites for colours are light eyes on dark petz and dark eyes on light pets. I find this combinations allows the eyes to contrast nicely with the coat of the pet.
Extra Credit Lesson
In this extra credit lesson, it outlines th emore artistic aspect of colouring a pet. It helps you have an understanding of what combinations go together well from an art point of view.
A key to hex painting petz is to find colour schemes or "Combos" which work well together. There are two main classes of combos which you should try to meet when hex painting a pet. Complimenting Colours are colours which blend well and have similar tones. An example of complimenting colour sis tan (105) and brown (95) because they both share a similar hue. Contrasting Colours are colours which stand out on one another. An example, most common, of contrasting colours is black and white. They do not share any hue likeness and they tend to look very resilliant when next to each other (like oposites).
Here is a chart of only a few combinations of each. The first column is examples of complimentry colour combinations while the second are examples of contrasting colour combinations:

Complimentary combinatiosn most usually consist of three colours which gradually fade between two extremes. Often times, a complimentary combinations has two contrastign colours.
For example: Black & White are contrasting colours, however, when you add a gradual colour, roughly between them in colour/hue/saturation, for example, grey, you turn the Black and white contrasting combo into a greyscale complimentary combo.
Lesson One (1) Assignments
Assignment hints: It is best to avoid using the heavily textured breeds when doing the assignments. The Tabby and the Orange Short Hair are examples of breedz which are difficult to use with the beginner assignments.
Assignment One (1)
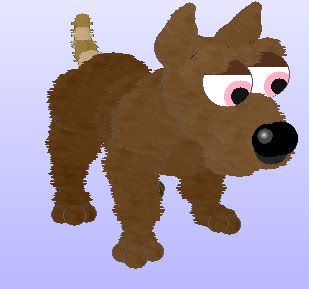
Using what you have learned about colour changing, create a pet from the original breedz which is coloured with three colours: cream (45), tan (105), and brown (95). Choose an appropriate eyelid colour and select an eyecolour(s) which match the colour of the coat to your liking. Only use the information you learned during this lesson.
Assignment Two (2)
Using what you have learned about colour changing, create a pet from the original breedz which encorperates three different colours into the coat (balls). Choose an appropriate colour for the eyelids and select an eyecolour(s) which match the colour to your preference. Be creative and use complimentary colours.
Assignment Three (3)
Using what you have learned about colour changing, create a pet from the original breedz which encorperates two or three different colours into the coat (balls). Choose an appropriate colour for the eyelids and select an eyecolour(s) which match the colour to your preference. Be creative and use contrasting colours.
Assignment Four (4)
Using what you have learned about colour changing, create a pet from the original breedz which encorperates two colours of your choice into a "half look". Make the back end of the pet one colour and the front end of the pet another colour. Choose an appropriate colour for the eyelids and select an eyecolour(s) which match the colour to your preference. You can choose whether to use contrasting colours or complimentar colours.
To submit your completed assignments, post their pictures in reply to this lesson thread. I will then comment, mark and give any necessary hints and tips to help you improve.
NOTES : You can submit your assignments in two fashions, A screen capture in Pet Workshop or as a pet in the game (adopt a pet and take pictures. It is prefered that you take a picture of both sides and one picture form the front (this goes for both methods of submitting your assignment).
INFO REQUIRED: Submitted Assignments shoudl include the Assignment number, three pictures (prefered, but not required), and any questiosn you have concerning the lesson.
Since this is the first of the lessons of the lowest level, a quick explanation of opening files and save the files is in need. Firstly, to open files, you must first open the program. You should get a blank rendering screen - a large blue square - which means the program is fully loaded. Go into the "File" menu and select "Open..." from the menu. The first time you use the PWS program, you will have to navigate to your Petz resource file.
For Petz 5
C: (c drive) -> Program Files -> Ubisoft -> Petz 5 -> Resource -> Dogz/Catz
For Petz 3/4
C: (c drive) -> Program Files -> Petz 3/4 -> Resounce -> Dogz/Catz
C: (c drive) may vary depending on your drives. Some computers will have a "D: (d drive)" or a "Z: (z drive)", some will even have other lettered drives. It is helpful to knwo where your petz game is installed, so once you find its location, you should make a note of it so you can know later on in the future.
Once you have navigated to the resource folder, you go into either the Dogz folder or the Catz folder, depending on what game version you own or wish to hex in. Once in that folder, choose what breed you wish to work with. By selecting your prefered breedfile, choose "Open" and the file will load. Like loading the program, loading a breed for the first time may take a few moments for your system to recognise and load all the renderings.
After you make any changes, you will want to save them. Thee are two saving methods, but for the beginners lessons, we will stick to the standard saving method which will allow you to create "Hexed petz" rather than new breedfiles.
To do this standard save, go into the "File" menu and select "Save". Be sure you do not choose "Save as..." when doing this. When you choose "Save" the program will pause for a brief moment (varying greatly on your computer speed) while it saves. If you selected the wrong one, a save window will pop up, which you do not want right now. After saving you are ready to continue hexing!
Note: For the beginner lessons, it is prefered you use Original UBISOFT or PFMAGIC breedz to work with. Hexed breedz tend to be a bit troublesome when removing variations and applying things.
WARNING: Always keep a backup of all breedfiles before saving your changes. Place a copy of the unaltered original files in a folder elsewhere on your computer so that int he future, you still posess them and can use them.
Variation Removal - Makes things Easier
To make things easier for the beginner, it is best to remove all variations. If you do not, during assignments it can be somewhat troublesome when trying to take out your finished product if you have the original variations hangign around in the file.
To remove the variations, after opening the breedfile, go to the "Breed" menu located at the top. From that menu, select the "Collapse all Variations" option. In hexed breedz, this will often times mess up the breed, which explains the reason for using original breedz for the lessons.
You now have a variation free breedifle to work with during these lessons! Now it will be significantly easier for you to learn and develope petz.
Basic Colour Changes
The Ball Colours
As default, the program automatically starts out on the colour tool when you open a file. If the colour tool at the top is not "indented" or "pushed in", click it so that it is. The colour tool, found at the top, is a circle with blue & red colouration. It should be the second tool on the bar. Below the breed rending you will see the following square and text:
Currently, the square (I will call this the display box) should be white with a red diagnal line through it. This shows that no colour is chosen therefore a default one will be in place, the default usually being basic black, no texture visible. To change this colour click the display box and a new window will pop up with all the possible colours on it which will look something like this:
Select a colour of your choice by clicking the box in which the colour resides. Once you select the colour, the colour's small box should get a series of dashed borders to show you it is selected. From there, click "OK" and the window should close. Once it does, your selected colour will appear in the colour display box.
When hexing, textures are always your friend. The game, however, only recognizes certain colours to have textures on them. It is best you use colours between 10 and 149. All other colours do not show textures. It prefered you stick to using the textured colours for all body colouring as many people do not like the untexture look - making the petz look flat instead of dimensional.
Now that you have the color selected, its time to apply the colour to the balls. There are two methods of doing this: One-by-one and Complete, as I like to call the methods. One-by-one is the first you will learn. Its great when you only want to colour a few balls on the file.
Once you have the colour selected, bring your mouse pointed over the rendering screen (where the visual representation of the breed is, backed in blue background). Click on the ball which you wish to colour change. It will take a few seconds to change (time varying greatly on your computer speed). Once it does, you should notice a difference in the ball colour. Occassionally, with some original breedz, a ball may choose not to change, but this is a rare occurance.
Now, once you get used to individually painting balls, you may want to make all the balls one colour. You can do this by accessing the ball list at the right. To do this, on the right hand top side, you will see five tabs: Eyes, Textures, Balls, Variations, and Scales & Sizes. Choose "Balls" and a list will appear something like this:
Make sure that the colour tool is selected and continue. You can select which balls you want to apply the colour to by clicking them. When you click the ball, it will highlight in blue. If you want to choose more than one ball, hold down Control ( [ctrl] ) and click on all the balls you wish to apply the colour to. Control will allow you to select more than one ball at a time.
A faster way, if you wish to choose several balls in a row is to hold down shift and click the first ball in the sequence and the last ball in the sequence.Now that you have selected the balls, click "Apply Tool to Balls" beneath the list and all the balls will gain the new colour.
You now can "Hex Paint" the petz.
Eye Colour & Eyelid Colour
An important aspect of simple hexes (and complex) is to make sure that the eyelids match the main coat colour. The main coat colour is the colour which is more common on the hexed pet. Usually, you base the eyelids on what colour the head is so that they match and look flowing.
Open the "Eyes" tab, located to the right of rendering screen. Onc eyou do, it will open a small screen in that area which looks similar to the follow. Note that the colours may be different when you open the tab compared to the example below:
As you can see, there are three colour display screens in this tab: Left Iris, Right Iris, and Eyelid Colour. Each works much like the ball colouring tool when choosing your colours.
Start by clicking on the Eyelid colour display box. The standard colour chart will pop up like the one shown above (second image). Select the colour which suits the body colour best. I usually prefer makign the eyelids a shade darker then the main body colour. For example, if you make the main body colour 45, make the eyelid colour 49 (cream). After clicking on the appropriate colour, select "okay" and the eyelids will change.
Now for the eye colour!
Eyecolours are fun to play around with. It is best to experiment with eyecolours versus coat colour. In the end, it really comes down to personal preferences. Like the eyelids, you simply click on the colour display under the "Iris" headings to change the colour. However, unlike the eyelids, you can choose a different colour for each eye, which allows for many combinations with eyecolours.
Teacher's Preference:
My personal favourites for colours are light eyes on dark petz and dark eyes on light pets. I find this combinations allows the eyes to contrast nicely with the coat of the pet.
Extra Credit Lesson
In this extra credit lesson, it outlines th emore artistic aspect of colouring a pet. It helps you have an understanding of what combinations go together well from an art point of view.
A key to hex painting petz is to find colour schemes or "Combos" which work well together. There are two main classes of combos which you should try to meet when hex painting a pet. Complimenting Colours are colours which blend well and have similar tones. An example of complimenting colour sis tan (105) and brown (95) because they both share a similar hue. Contrasting Colours are colours which stand out on one another. An example, most common, of contrasting colours is black and white. They do not share any hue likeness and they tend to look very resilliant when next to each other (like oposites).
Here is a chart of only a few combinations of each. The first column is examples of complimentry colour combinations while the second are examples of contrasting colour combinations:
Complimentary combinatiosn most usually consist of three colours which gradually fade between two extremes. Often times, a complimentary combinations has two contrastign colours.
For example: Black & White are contrasting colours, however, when you add a gradual colour, roughly between them in colour/hue/saturation, for example, grey, you turn the Black and white contrasting combo into a greyscale complimentary combo.
Lesson One (1) Assignments
Assignment hints: It is best to avoid using the heavily textured breeds when doing the assignments. The Tabby and the Orange Short Hair are examples of breedz which are difficult to use with the beginner assignments.
Assignment One (1)
Using what you have learned about colour changing, create a pet from the original breedz which is coloured with three colours: cream (45), tan (105), and brown (95). Choose an appropriate eyelid colour and select an eyecolour(s) which match the colour of the coat to your liking. Only use the information you learned during this lesson.
Assignment Two (2)
Using what you have learned about colour changing, create a pet from the original breedz which encorperates three different colours into the coat (balls). Choose an appropriate colour for the eyelids and select an eyecolour(s) which match the colour to your preference. Be creative and use complimentary colours.
Assignment Three (3)
Using what you have learned about colour changing, create a pet from the original breedz which encorperates two or three different colours into the coat (balls). Choose an appropriate colour for the eyelids and select an eyecolour(s) which match the colour to your preference. Be creative and use contrasting colours.
Assignment Four (4)
Using what you have learned about colour changing, create a pet from the original breedz which encorperates two colours of your choice into a "half look". Make the back end of the pet one colour and the front end of the pet another colour. Choose an appropriate colour for the eyelids and select an eyecolour(s) which match the colour to your preference. You can choose whether to use contrasting colours or complimentar colours.
To submit your completed assignments, post their pictures in reply to this lesson thread. I will then comment, mark and give any necessary hints and tips to help you improve.
NOTES : You can submit your assignments in two fashions, A screen capture in Pet Workshop or as a pet in the game (adopt a pet and take pictures. It is prefered that you take a picture of both sides and one picture form the front (this goes for both methods of submitting your assignment).
INFO REQUIRED: Submitted Assignments shoudl include the Assignment number, three pictures (prefered, but not required), and any questiosn you have concerning the lesson.


 -> B+
-> B+


